Saturday 9 July 2016

Strapless Cherry Dress with full skirt or I've been a good student of the sewing school of life- I won't be naughty and rush a frock again!!

I was sent back to school on this one!

Lesson No.1
Never make a garment in a hurry with unrealistic timeframe

Lesson No.2
Pattern matching requires tracing paper

Lesson No.3
Don't make a circle skirt when you're short on fabric.

Lesson No.4
Patternmatching takes additional fabric (see lesson No.3)


 The bodice on this strapless cherry frock is based on Burda  The Bustier Dress with Draped Detail 5/2011 #122A (see the one I posted previously http://missjsews.blogspot.co.uk/2016/04/tiki-dress-perfect-bombshell-dress.html the skirt is a basic circle skirt from Butterick B6019 as I was so short on time I didn't want to take time to draft my own.

Did I mention that there is horsehair braid and boning in this one.  All stuff that you do when you're in a hurry right???
The cotton lining

I was so fixated on getting the frock finished to wear to my event that I rushed headlong into this project.  On the bodice I managed to pattern match the back but at the bust and side bodice pieces I opted to try and place the cherries in a nice way.

Looking back, I could, with tracing paper and more fabric and time have matched the pattern across many of the bodice seams. Can you believe I sat through a pattern matching class before doing this.  Ha!

Now I cut the bodice before the skirt only to realise the fabric was insufficient.  Damn it!

Fortunately the cherries are fairly random, so I turned the skirt along the weft and then horror of horrors, had to put a seam in the front of my skirt to make it fit.

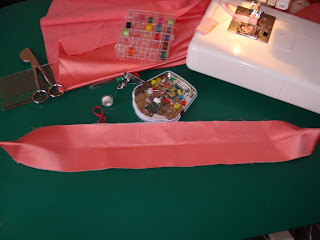
Now, here I put my foot down with myself and decided that pattern matching was a must on the now mandatory front seam.

Cue frantic searching for repeat patterns and finding the match on the other front skirt piece and a heck of a lot of glass head pins.
The pattern matched cherries are horizonately across the photo

Did I mention that I underlined the bodice and lined the skirt?   I allowed the skirt a couple of days  hanging time for the bias and wow, did that lining show under the skirt.  Put my horsehair braid to give me that swing, and wouldn't you know it, the lining is still showing under the skirt.  I mean really showing so wavy and uneven that looking at it could make you seasick.   Aaaahaahaahhhhhhhhhh!!!!!!
If you've ever unpicked horsehair braid when you've stupidly sewn it on with your machine on 2 stitch length, you'll know it takes time.
Horsehair braid

The waist stay
Well now, out of the mouth of disaster comes a wearable garment.  I'm well peeved coz I was sewing in the horsehair braid back in on the day of the event and had to leave the dress, unfinished, and wear something else. Just another half hour would have done it!

Anyhow, my dress form is looking rather lovely in her new frock. I've still not worn it it.

My cherry print full skirted frock
I've been a good student of the sewing school of life- I won't be naughty and rush a frock again!!

Tuesday 26 April 2016

Tiki Dress, Perfect Bombshell Dress, Burda Bustier Dress with Draped Detail 5/2011 #122A - Whatever you call it, I'm so late on this, everyone else did this four years ago!

I
Hello!

It's been a long time. Has anyone missed me?
Perhaps not, but none the less, it's good to be back!

You know what? I just don't have enough time to sew and therefore it takes me an age to complete anything and I've not yet mastered the art of blogging when I haven't got any garments to show.  This is going to be the most picture heavy post I've ever done, hope you'll remain on board!

Let's get into this!

The Craftsy class : Sew Retro- The Perfect Bombshell Dress came out years ago, but I've never been first in the queue for anything so why start now?

-

Lemme tell you right now, if you're looking for a quick sew, then this aint the frock for you. We're talking hand sewing, boning. lining, underlining - you get the picture. Anyone who's done this frock will remember the time and love that needs to go into it, but with Gertie the class tutor guiding you through the journey it's not so bad.  
Now this class is no longer available at Craftsy, but the pattern still exists it's Burda Bustier Dress with Draped Detail 5/2011 #122A, just leave off the weird flappy piece on the side, I don't think it looks cute, but feel free to disagree with me if you do.


Muslin/Toile - Mandatory.   Please don't skip this step as there is no ease in this bodice.  It's strapless so unless you want to run the risk of exposing your boobs, muslin it is. Now is the chance to make sure your cup fits right.Yes, its a huge time stealer, but it least you get a run through on how to put this thing together.


Know your fabric: My fabric is a peach cotton which has a bit of body, but the class advises underlining it for stability.  I used muslin to underline the bodice and poly cotton to underline the skirt. Gives everything a bit more oomph, but I tend to underline everything, this is becoming a bit of a habit.

Structure: This thing needs to stay up and hold its own. Padding out the cups and boning is required.  For the padding, I used cotton batting.  It seemed a bit flimsy, so I doubled up on it.  


For the boning, I used spiral steel on a roll.  This was extremely time consuming. Sewing in the boning channels was okay, but I'm telling you now, cutting the spiral steel to size was no fun. See the cutters in the picture?  Couldn't touch it.  In the end, the technique that worked for me was to mark the length with tape and the then bend the steel forward and backward until it snaps. Then cover with end caps. 


Vintage details : This pattern featured a waist stay and also a zip guard - so good so that you don't catch yourself in your zip.  I opted to make my own zip guard and interface  instead of using a length of petersham as suggested. Figure that I'd gone this far, might as well make the zip guard nice. The tried and tested Sunni Standing Mastering Zipper Techniques on Craftsy worked for me.  Sorry Gertie, I couldn't get with the technique used in the class, but I suspect that would be a good method if you were pattern matching at the back seam. I finished the hem with ribbon and handstiched the hem. 


 The gathered skirt is a nice feature, but I found out that unlike the rest of the world, gathering on the machine didn't work for me.  Gathering by hand was the key and it was a whole lotta material to sew through. An unexpected time stealer that turned out nice in the end. Almost forgot to mention that the halter straps are removable - attached via buttons inside as suggested in the class.

I'd make this frock again, maybe with a different skirt, but it's a no quick sew, but it's a solid pattern and the Craftsy class is good.